Title here
Summary here

Tip
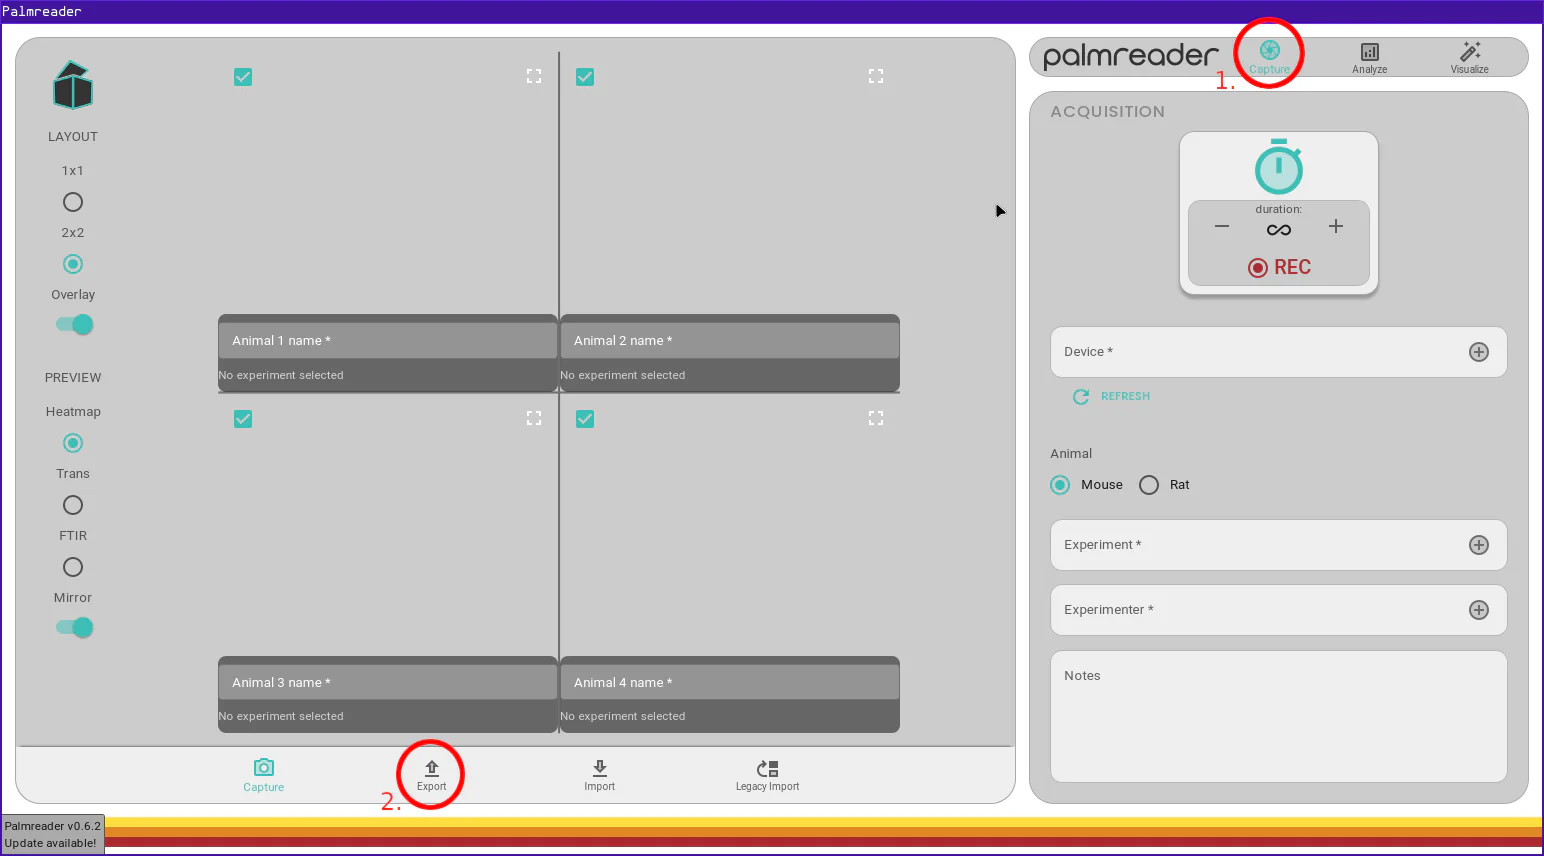
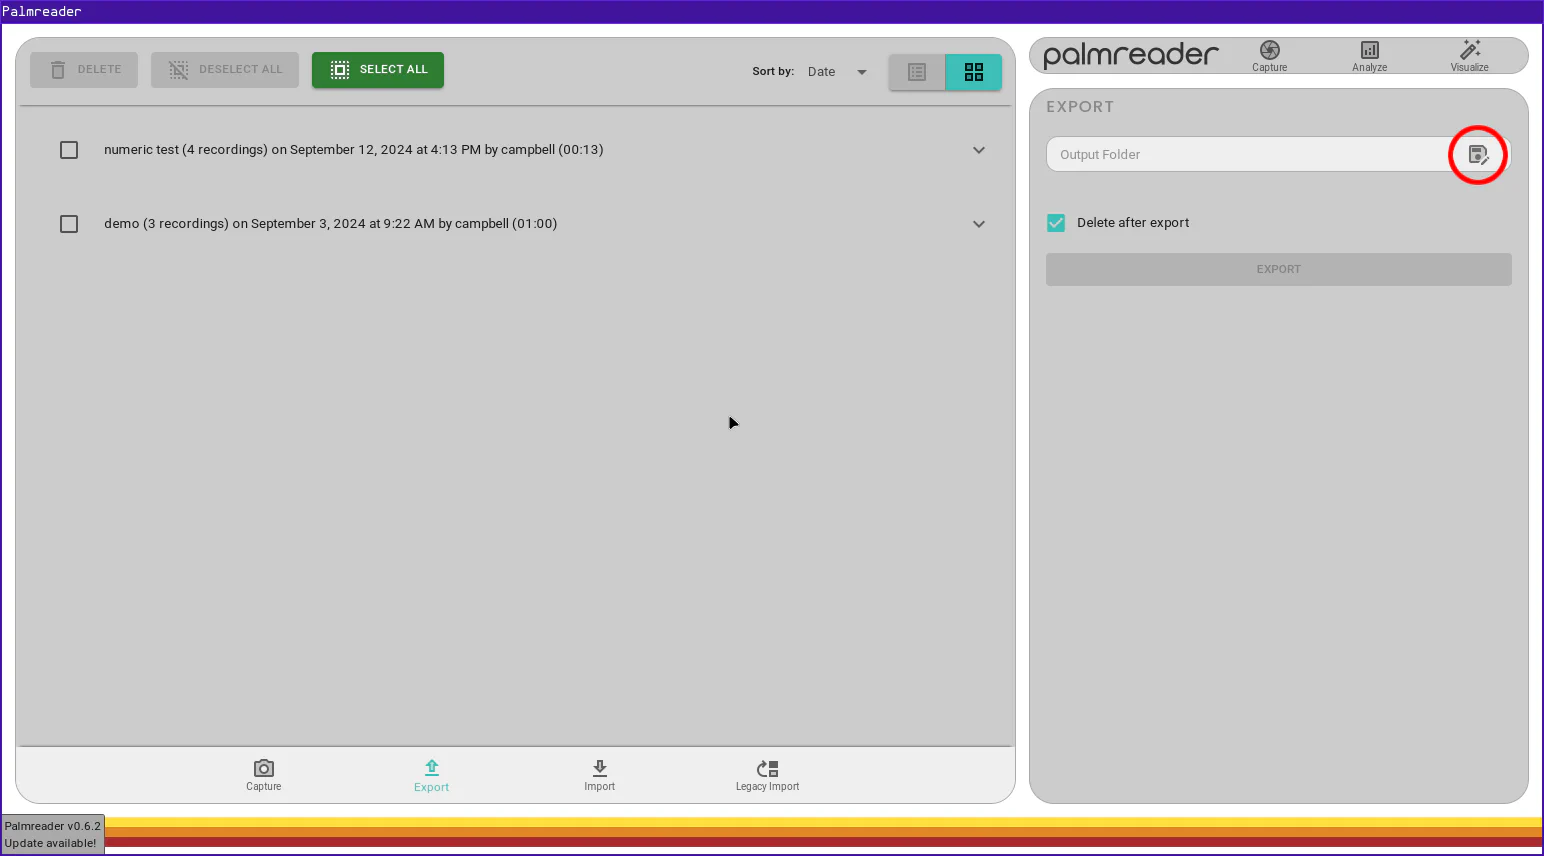
If you wish to export all captures, simply press the “Select All” button at the top of the screen.
Note
The chosen destination can be on an external drive. You can see all available drives on the left sidebar in the destination selection dialog.
Creating a new folder for the exports is highly recommended as the export tool will create one file for each capture selected.
Exports are generally quick, but the speed is highly dependent on the length of the individual captures and the quantity selected for export. If the chosen destination is on an external drive, the export speed will also be dependent on the write speed of that drive.
You may notice a checkbox labeled “Delete after export” that is checked by default. It is highly recommended that you leave this checked. There are very few cases where you want to duplicate captures (which happens when this is unchecked). It is best to keep a Single Source of Truth .
Palmreader exports each capture to a .plm file whose filename is its internal capture ID. These files can be renamed as desired, as long as the .plm file extension is not changed.